
5 min read
Stabilizer rattle is the loose, metallic chatter you hear when you press the spacebar, Enter, Shift, or Backspace on a mechanical keyboard. The key still works, but it sounds cheap and wobbly, and it can make an expensive keyboard feel unfinished.
This guide explains what a mechanical keyboard stabilizer rattle is and how to fix it. You will learn what stabilizers do, why larger keys rattle, which simple fixes help, and when to open the keyboard for a proper stabilizer job.
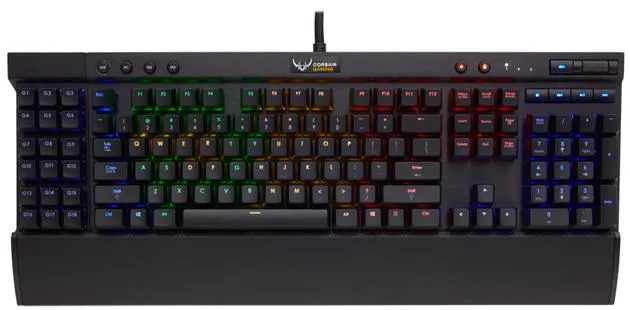
What Stabilizer Rattle Sounds Like
Stabilizer rattle sounds like a faint metallic tick or a loose buzz on top of the normal key sound. It appears on long keys, such as the spacebar, Enter, Shift, and Backspace, and it is loudest when you press the key off-center. A centered press may sound clean while a corner press rattles, which is the classic sign of a stabilizer problem.
The rattle comes from small metal wires and plastic parts that keep a long key level. A long key presses on one switch in the middle, so it needs extra guides at each end to stop it tilting. Those guides are the stabilizers, and any looseness in them turns into rattle.
Rattle is not the same as a ping from the switch or a hollow case sound. Switch ping rings after the press, and case echo sounds hollow on every key. Rattle is specific to long keys and to off-center presses, which makes it easy to identify once you know what to listen for.
Why Larger Keys Rattle
A long key spans two or three switch widths, so a press at one end levers the other end upward. The stabilizer wire links both ends so the key moves down evenly. If the wire is bent, loose, or dry, the key tilts slightly and the wire ticks against the plastic. That tick is the rattle you hear.
Manufacturing tolerance adds to the problem. Stabilizer wires vary slightly, and a wire that is a fraction of a millimeter loose in its housing will rattle. Budget keyboards often ship with dry stabilizers that were never lubricated, which is why rattle is common even on new boards.
Wear makes rattle worse over time. The plastic stems and housings wear with use, the wire seats loosen, and the lubricant dries out. A keyboard that sounded fine when new can develop rattle after months of heavy typing, especially on the spacebar, which takes the most presses.
Simple Fixes Without Opening the Board
Press each long key slowly and listen. Note which keys rattle and whether the rattle comes from the left, the right, or both ends. A rattle on one end points to that stabilizer, while rattle on both ends points to the wire. This diagnosis takes a minute and tells you where to work.
Remove the keycap and reseat it. A keycap that is not fully seated can rock and rattle on its own. Pull the keycap off with a keycap puller, check the stems for cracks, and press it back on firmly until it sits level. Test again before you do anything more involved.
Check the keycap itself. Some keycaps, especially long spacebars, are slightly warped, and a warped spacebar rattles no matter how good the stabilizers are. Swap in another spacebar if you have one. If the rattle disappears, the keycap was the problem, not the stabilizer.
Lubing and Clipping Stabilizers
Lubricating the stabilizers is the most effective fix. Remove the keycap, apply a small amount of thick lubricant, such as Krytox 205g0 or a similar grease, to the wire ends and the stabilizer stems where the wire sits. Work the stabilizer up and down a few times to spread the grease, then replace the keycap and test.
Clipping removes a small extra leg on some stabilizer stems that can catch and tick. It requires removing the stabilizer from the board, so it suits keyboards with screw-in or clip-in stabilizers that you can remove without desoldering. Clip the legs flush, smooth the cut, lubricate, and reinstall. Only clip if you are comfortable opening the keyboard.
Balance the wire if the rattle persists on one side. A slightly bent wire makes one end sit higher than the other. Remove the wire, lay it on a flat surface, and gently straighten it until both ends sit evenly. Reinstall it carefully, since a wire that is forced back in can bend again.
When to Replace the Stabilizers
Replace the stabilizers when lubrication and balancing do not help. Worn housings, cracked stems, or a wire that will not stay straight mean the parts are done. Screw-in stabilizers from a reputable brand cost little and feel far better than cheap stock stabilizers, and they are a common first upgrade for a mechanical keyboard.
Choose stabilizers that fit your board. Check whether your keyboard uses clip-in or screw-in stabilizers, and buy the matching type. A screw-in stabilizer will not fit a board drilled for clip-in stabilizers, and forcing it can damage the printed circuit board. Measure twice and buy once.
If the keyboard is under warranty, contact the seller before you open it. Opening the case can void the warranty on some boards. A warranty replacement or a repair may be free, and it saves you from a job that takes an hour or more on your first attempt.
Keep this tab open a moment longer: below are more mechanical-keyboard articles chosen to follow this one, led by Custom Keycaps: A Crash‑Course Tutorial for Beginners.
Related Articles:
- Custom Keycaps: A Crash‑Course Tutorial for Beginners
- Optimize Mechanical Keyboard: Easy Fixes for Better Performance
- Fixing Keyboard Switches Random Shutdown: 2026 Guide
What is your take?
Share your experience or questions in the comments — especially if you have used this tech yourself.
Found this useful? Share it with a friend who would want to know.